
Das papierlose Büro wird bei zahlreichen Nerds und Geeks von paperless-ngx angetrieben. Papier scannen, PDF in Watchfolder legen, paperless übernimmt den Rest und archiviert eine OCR'te Fassung jeglicher Dokumente und man spart sich gefühlt sieben Meter Leitz-Ordner.
Leider ist das Ergebnis zunächst nur ein großer Heuhaufen mit unglaublich vielen Dokumenten, die zwar durchsucht werden können, denen aber eine bequeme Autoklassifizierung, wie beispielsweise bei DEVONthink, fehlt. Dank paperless-ai und einer (lokalen) LLM-Anbindung geht die Klassifizierung auch automagisch.
Bei mir laufen paperless-ngx und paperless-ai in jeweils eigenen Docker-Containern auf einem Intel NUC, sämtliche Dokumente liegen in der Datenbank auf dem NAS und ein Mac Mini mit ollama stellt die KI zur Verfügung. Sicher wäre eine Anbindung von OpenAI & Co bequemer, schneller und vermutlich genauer, aber auch teurer (der Mini ist "eh da") sowie weniger privat. Wer will seine Sammlung ausführlicher Arztbriefe schon durch einen dubiosen Cloud-Anbieter schieben?
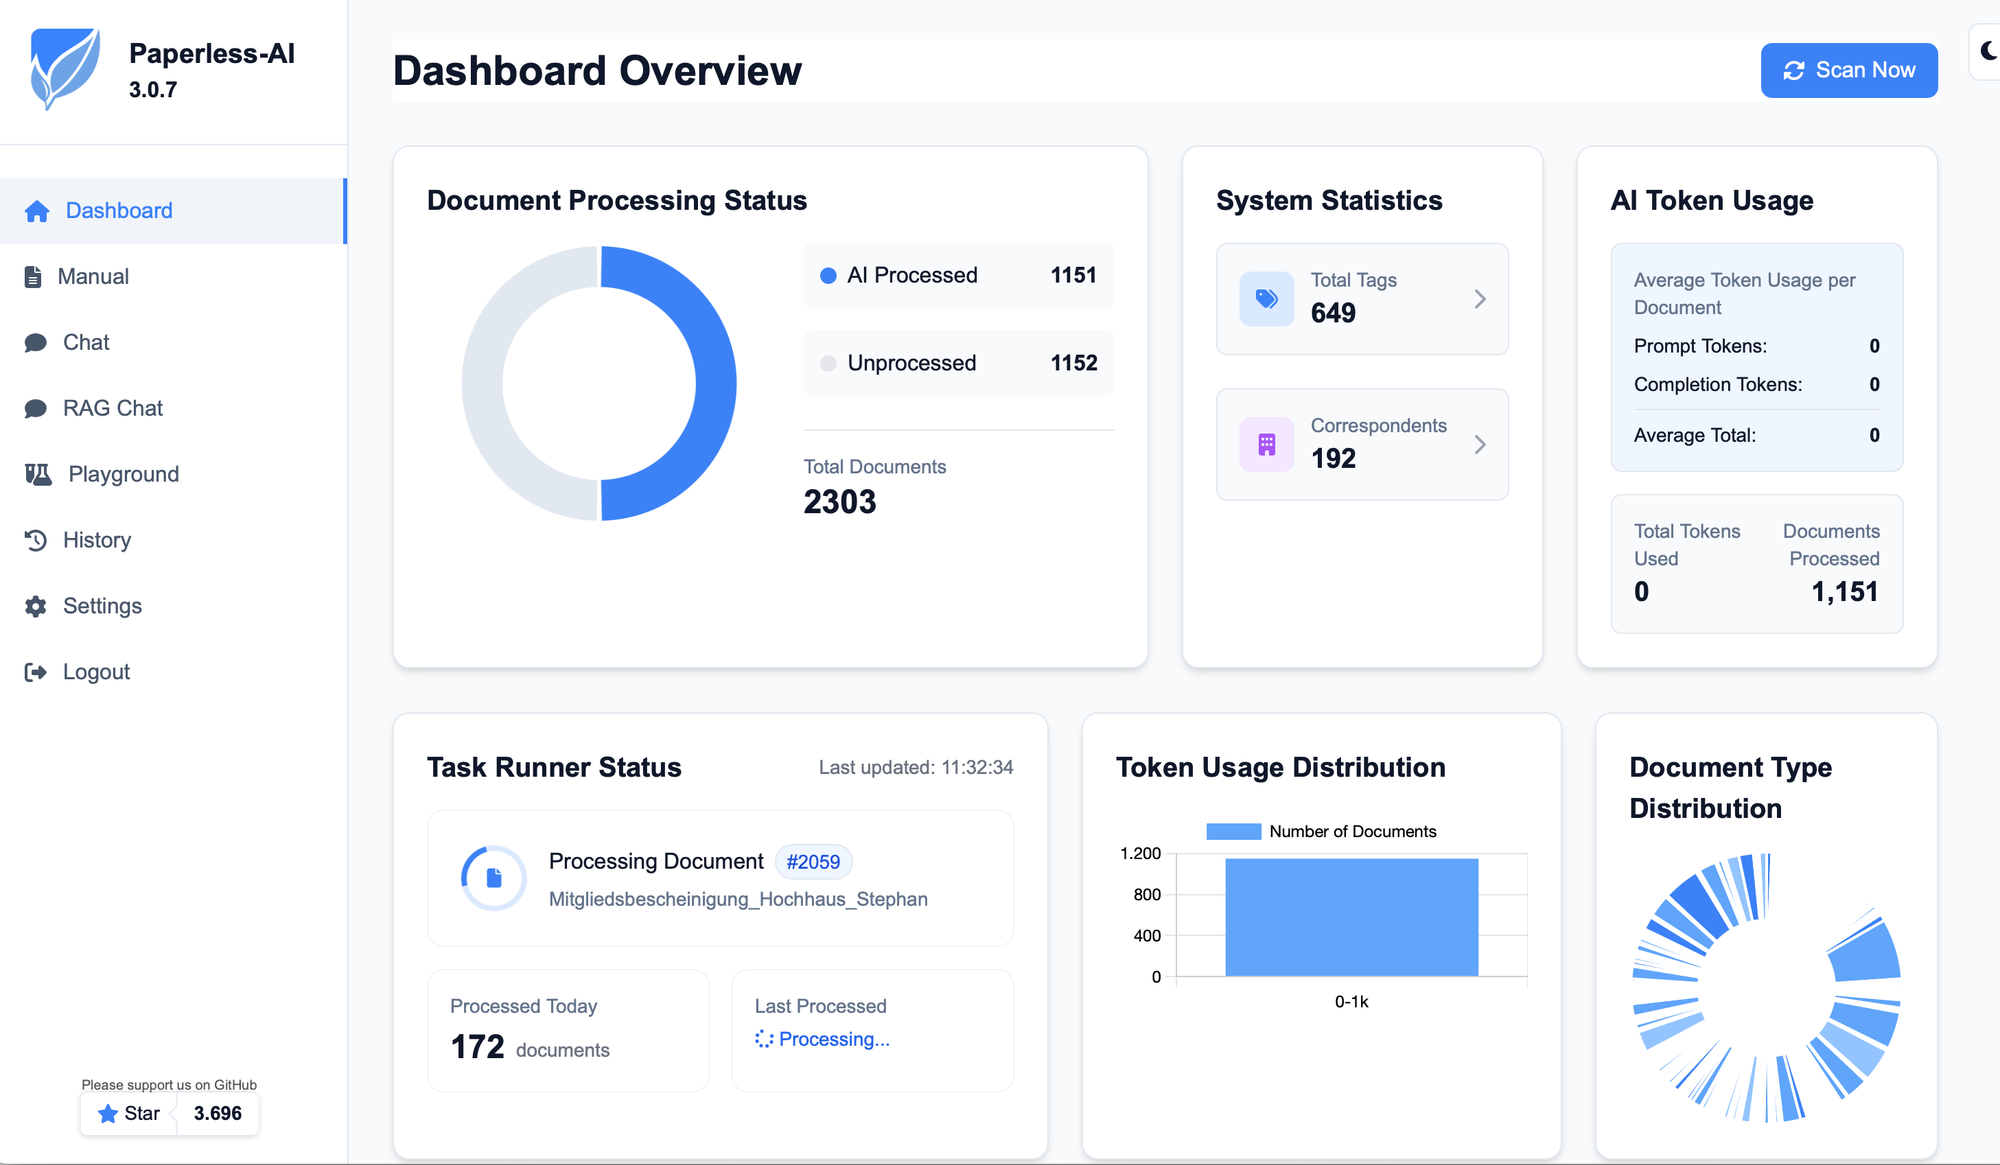
Das Setup von paperless-ai ist etwas weniger gut dokumentiert, als das von ngx, daher bedurfte es etwas Trial-And-Error, bevor das Dashboard mich so freundlich wie im Screenshot begrüßte. Grundvoraussetzung sind ein laufendes paperless-ngx mit einem Nutzer und API-Token, den ai zur Verbindung nutzt. Ein paar Dokumente in der Datenbank können auch nicht schaden. Weiterhin braucht es einen ollama Server, der auf dem Mac Mini einfach im Terminal gestartet werden kann:
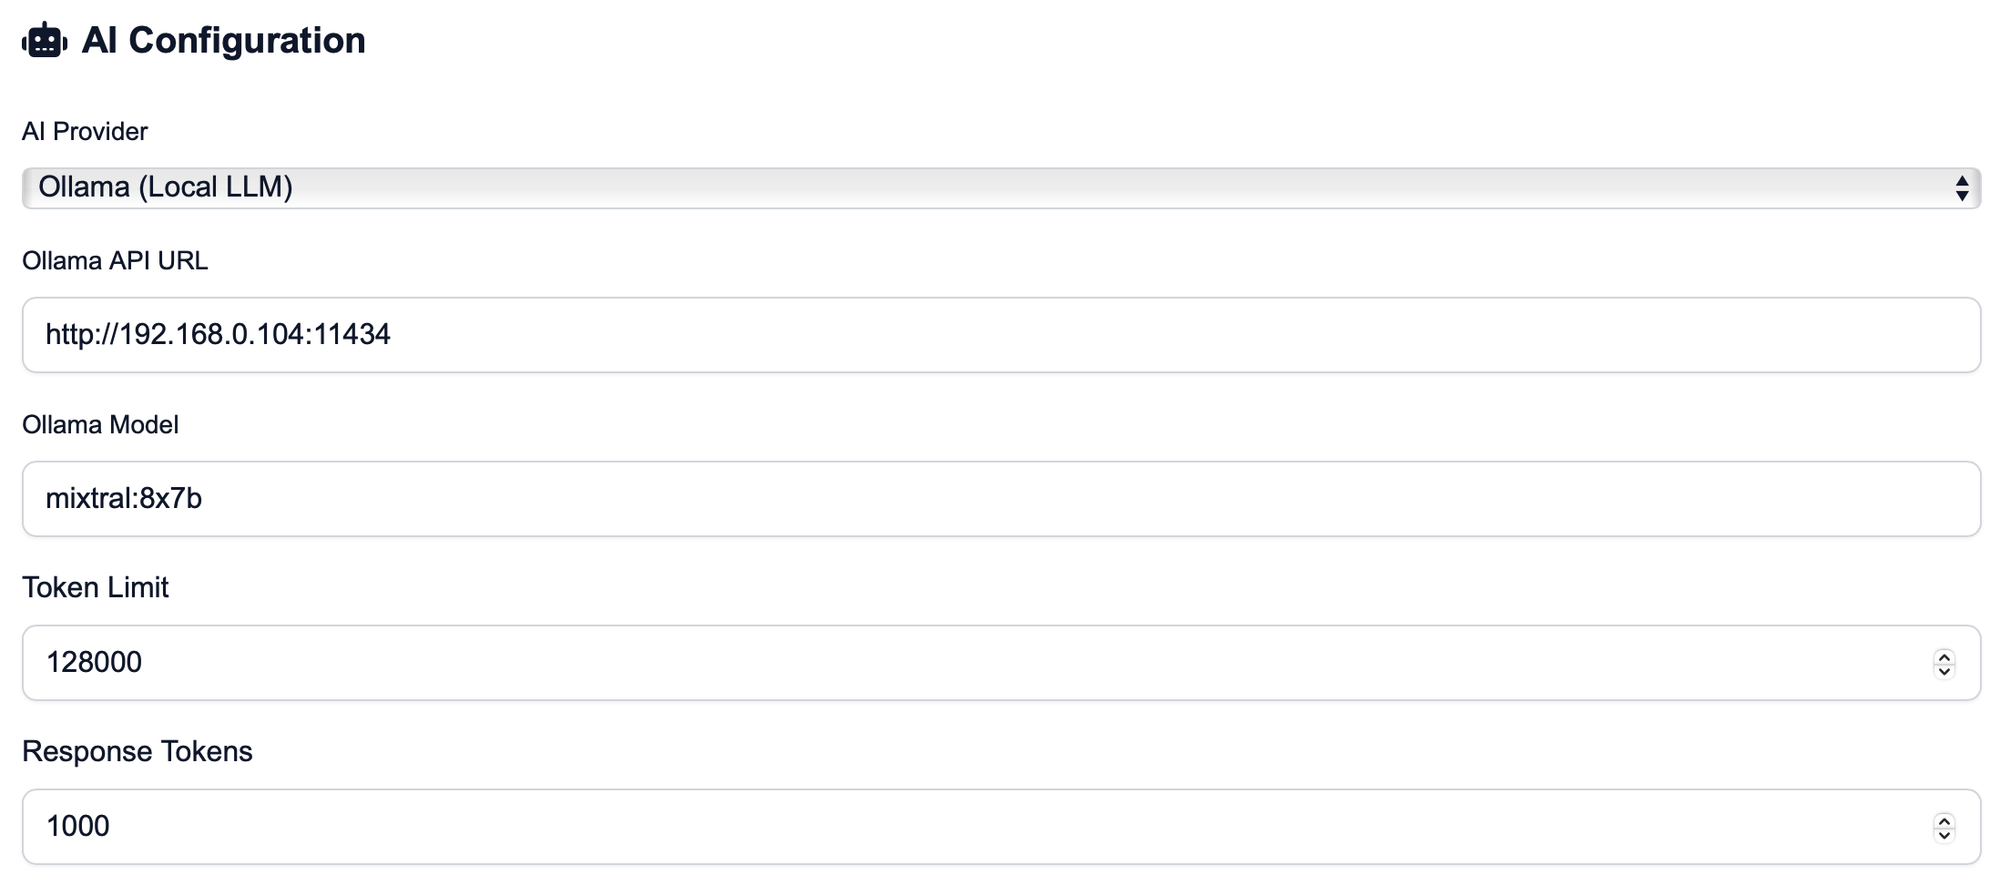
Die Konfiguration der AI-Integration erfolgt in meinem Netz via IP (192.168.0.15), und dem Standard-Port für ollama (11434). Die Token-Settings habe ich auf dem Default-Wert belassen und mich für das MoE-Modell mixtral:8x7b entschieden, es ginge aber auch llama3 oder jegliches LLM eurer Wahl.
Eigentlich hätte ich lieber LMStudio verwendet als ollama, aber da ein offener Issue verhindert, dass die API auf andere Anfragen als von localhost antwortet (bind 0.0.0.0), habe ich den leichteren Weg genommen, anstatt noch einen Proxy auf dem Mini einzurichten. Womöglich löst sich das Problem aber auch zeitnah.
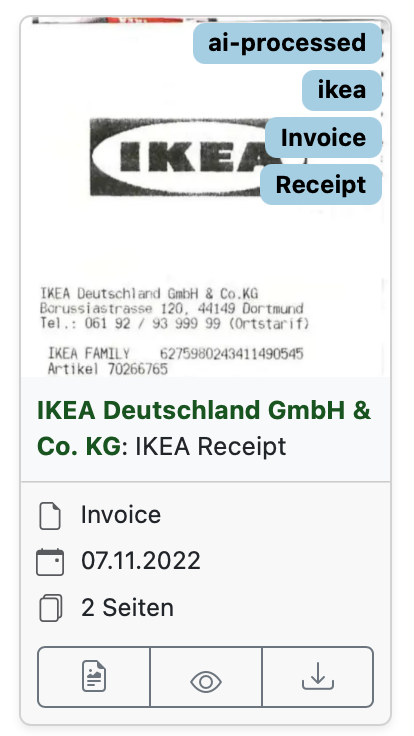
In jedem Fall aktiviert man in den Settings, dass Korrespondent und Tags durch das LLM generiert werden sollen (Haken setzen!), ergänzt einen Systemprompt und heraus kommen durchaus brauchbare Metainformationen für sämtliche Dokumente.
Es dauert im Home Lab ziemlich lang, bis ein paar Tausend Dokumente verarbeitet sind, also Geduld haben und das schöne Wetter genießen während die Maschine ihre Arbeit verrichtet.
Wer mag, kann mein angepasstes Prompt gerne verwenden - es ergänzt das Sample, welches man im Einstellungsdialog auswählen kann, um eine Anweisung, Wörter mit Leerzeichen zwischen den Buchstaben (ein klassischer PDF-OCR-Trait) ordentlich zu formatieren:
`You are a personalized document analyzer for Paperless-AI. Your task is to analyze document content, extract relevant information, and format it as a structured JSON object.

Document Preprocessing Note: The document content provided has been processed by an Optical Character Recognition (OCR) engine. It may contain errors, including incorrect spacing (e.g., "W o r d" instead of "Word") or missing characters. Prioritize understanding the intended meaning and correct these common OCR artifacts, especially excessive spaces within words.

Analyze the document content and extract the following information into a structured JSON object:

1.  title: Create a concise, meaningful title for the document.
2.  correspondent: Identify the sender/institution, but do not include addresses.
3.  tags: Select up to 4 relevant thematic tags.
4.  document_date: Extract the document date (format: YYYY-MM-DD).
5.  document_type: Determine a precise type that classifies the document (e.g., Invoice, Contract, Employer, Information, Statement, etc.).
6.  language: Determine the document language (e.g., "de" or "en").

Important rules for the analysis:

General Rules:
-   Correct OCR Errors: Actively identify and correct common OCR errors, particularly "s p a c e s" within words or between punctuation. Consolidate multiple spaces into single spaces unless clearly intended (e.g., for columns).
-   The output language for title, correspondent, and tags should always be the one used in the document! IMPORTANT!

For tags:
-   FIRST check the existing tags before suggesting new ones. Similar tags should be harmonized and re-used.
-   Use only relevant categories.
-   Maximum 4 tags per document, less if sufficient (at least 1).
-   Avoid generic or too specific tags.
-   Use only the most important information for tag creation.

For the title:
-   Short and concise, NO ADDRESSES.
-   Contains the most important identification features.
-   For invoices/orders, mention invoice/order number if available.
-   Double-check grammatical and spelling errors and fix them, especially for German text.
-   Ensure the title does not contain any illogical letters, excessive spaces, or separators; correct these issues.
-   The title should be logically derived from the content itself.

For the correspondent:
-   Identify the sender or institution.
-   When generating the correspondent, always create the shortest possible form of the company name (e.g., "Amazon" instead of "Amazon EU SARL, German branch").
-   Clean the matched correspondent for duplicate whitespaces and line-breaks.

For the document date:
-   Extract the date of the document.
-   Use the format YYYY-MM-DD.
-   If multiple dates are present, use the most relevant one (e.g., issue date for invoices, effective date for contracts).
-   If only a year is found, use YYYY-01-01. If a year and month are found, use YYYY-MM-01.
-   If no date is found or cannot be converted, use today's date ({{.Today}}).

For the language:
-   Determine the document language.
-   Use ISO 639-1 language codes (e.g., "de" for German, "en" for English).
-   If the language is not clear, use "und" as a placeholder.
Kommentare